
The basic operating procedure for a self loading concrete mixer follows a clear sequence: inspect the machine → start the engine → start weighing system and set formula → load and measure materials → add water → mix the concrete → drive to the pouring location → discharge concrete → clean the mixer. Following the correct sequence helps maintain safe operation and consistent concrete quality. The exact operating controls and material-loading sequence depend on the machine model and its operator’s manual.

How to Operate a Self Loading Concrete Mixer – Step-by-Step Guide
Prepare and Check the Mixer Before Operation
Before operating a self loading concrete mixer, ensure that the operator is trained, the work area is suitable, and the machine is in safe working condition.
- Check Fluid Levels: Check the engine oil, coolant, fuel, hydraulic fluid, and other items specified in the operator’s manual.
- Inspect the Machine: Check the tires, brakes, steering, hydraulic hoses, loading bucket, mixing drum, and discharge mechanism for visible damage or defects.
- Check the Work Area: Confirm that the travel route and concrete discharge area are clear and suitable for the planned work.
- Prepare Materials: Confirm the required materials and mix proportions according to the approved mix design.
Proceed only when the required checks are satisfactory. Don’t operate the self loading mixer if a critical defect, fluid leak, or safety-system fault remains unresolved.
Start the Engine and Check Machine Readiness
Sit in the operator’s position and start the engine using the ignition key or start button, depending on the model. Check the dashboard readings and warning indicators, then allow the engine to warm up according to the operator’s manual before loading materials.
- Check Dashboard Readings: Confirm that oil pressure, coolant temperature, and other relevant readings are within the normal operating range.
- Allow the Engine to Warm Up: Let the engine idle for the period specified in the operator’s manual.
- Confirm System Readiness: Check that the hydraulic, weighing, and water-metering systems are ready for operation, where applicable. Ensure the required water supply is available.
Proceed to material loading when the engine readings are normal and the systems required for the next operation are ready.
Activate the Weighing System and Select the Mix Recipe
Before loading materials, activate the electronic weighing system on the cab’s control panel and select or enter the approved concrete mix recipe. The recipe determines the target quantities of cement, sand, aggregates, and water for the required concrete grade, like C25, C30, C34, C40, C45, C50
- Select the Mix Recipe: Choose the project-approved mix design from the control panel or enter the required material quantities according to the machine’s operating instructions.
- Set the Batch Size: Confirm the target batch quantity and ensure it is within the machine’s rated capacity.
- Verify the Weighing System: Check that the weighing display is functioning and that the system is ready for material measurement. Follow the operator’s manual for zeroing or calibration, if required.
Verify the selected recipe and batch settings before proceeding to material loading. Always use the project-approved mix design rather than relying solely on preset recipes.
Load the Concrete Materials
Position the self loading concrete mixture machine on suitable, stable ground near the material stockpiles. Use the hydraulic loading bucket to collect sand and aggregates, then transfer them into the mixing drum according to the selected concrete mix recipe. During loading, monitor the onboard weighing display, if equipped, and stop loading when the preset target weight for each material is reached.
- Lower the Loading Bucket: Use the hydraulic controls or joystick to position the front bucket for loading.
- Scoop Sand and Aggregates: Collect the required sand and gravel or crushed stone according to the mix recipe.
- Monitor Weight and Discharge: Check the weighing display as material is loaded. Once the preset target weight is reached, raise and tilt the bucket to discharge the material into the mixing drum.
- Load Cement: Add the specified amount of cement using the machine’s designated loading method and follow the prescribed loading sequence.
Verify that the required materials have been loaded according to the selected mix recipe before proceeding to water addition. The weighing method and loading sequence vary by model, so follow the manufacturer’s instructions.
Add Water to the Mixing Drum
After loading the concrete materials, add the specified amount of water according to the approved concrete mix recipe. Use the onboard water system to deliver the required volume into the mixing drum.
- Check the Water Supply: Ensure that the water tank contains sufficient water for the planned batch.
- Add the Required Water: Activate the onboard water pump or the designated water supply system and add water according to the mix recipe and the machine’s operating instructions.
- Monitor Water Quantity: Use the water meter or weighing control panel, to track the amount of water added. Avoid adding excess water, as it can alter the concrete’s workability and strength.
Once the specified amount of water has been added, proceed to the concrete mixing stage.
Mix the Concrete Mixture
After adding water, operate the mixing drum to blend the cement, sand, aggregates, and water into a uniform concrete mixture. Follow the manufacturer’s instructions for drum rotation direction and speed.
- Start the Mixing Drum: Engage the drum rotation controls to start mixing the materials. Adjust the drum speed to achieve the desired concrete consistency.
- Control Mixing Time: As a general guideline, mix for approximately 3–5 minutes, or as specified in the operator’s manual and approved mix design, until the concrete has a uniform appearance and consistency.
Once the concrete is thoroughly mixed and reaches the required consistency, proceed to discharge.
Transport the Concrete to the Pouring Location
After mixing, drive the self loading concrete mixer truck to the pouring location along a suitable, unobstructed route.
- Prepare for Travel: Retract and lower the loading bucket or arm to the designated travel position to maintain stability and visibility.
- Maintain Drum Rotation: If required by the machine, keep the drum rotating in the prescribed mixing or agitation mode during transport to help prevent the concrete from settling or segregating.
- Drive Safely: Travel at a speed appropriate for the site conditions. Check the route for uneven ground, steep gradients, overhead obstructions, and pedestrians, especially on narrow construction sites.
Once the mixer reaches the pouring location, position it safely for concrete discharge.
Discharge the Concrete
Position the concrete mixer self loading securely at the designated pouring location and ensure the discharge area is clear. Direct the discharge chute toward the target placement area, such as formwork, a road section, or a concrete pump hopper.
- Position the Discharge Chute: Lower, extend, or rotate the chute as needed to direct the concrete into the target area or receiving equipment.
- Activate Discharge Mode: Use the designated discharge controls. Depending on the model, this may involve reversing the drum rotation to release the concrete.
- Control the Discharge Flow: Adjust the discharge controls as instructed to maintain a steady flow and reduce spillage. Monitor the concrete as it leaves the drum.
- Maintain a Safe Discharge Area: Keep personnel clear of the chute, drum, and other moving components during unloading.
Once the concrete has been discharged, proceed to clean the mixing drum.
Clean the Mixer and Shut Down the Machine
Clean the self loading concrete mixer promptly after discharging the concrete to prevent residue from hardening inside the mixing drum and on other components.
- Discharge Remaining Concrete: Empty any remaining concrete from the mixing drum before cleaning.
- Flush the Mixing Drum: Use the onboard water system or designated cleaning equipment to remove concrete residue from the drum and mixing blades. Rotate the drum during cleaning only as instructed in the operator’s manual.
- Clean Other Components: Rinse the loading bucket, hopper, and discharge chute, paying attention to areas where concrete may accumulate.
- Park and Shut Down: Park on suitable, level ground, lower the loading bucket to the designated safe position, engage the parking brake, and shut down the engine according to the manufacturer’s instructions.
Before the next operating cycle, check for visible damage, fluid leaks, or loose components and address any issues before using the mixer again.
Following these 9 steps helps operators complete the concrete production cycle, from pre-operation checks and material batching to mixing, discharge, and cleaning. Always follow the operating instructions for your specific mobile self loading concrete mixer model and adjust the procedures to suit the approved mix design and site requirements.
Watch the Operation Video: Following Operations Steps for Construction on-site
Watch the video below to see a self loader concrete mixer in action, following the operating steps outlined in this guide. The demonstration shows how the self loading mixer machine in Indonesia handles material loading, concrete mixing, transportation, and discharge for concrete precast production. Use it as a practical reference to better understand the operating sequence and how the mixer can support on-site concrete production for precast components.
Safety Considerations When Operating a Self-Loading Concrete Mixer
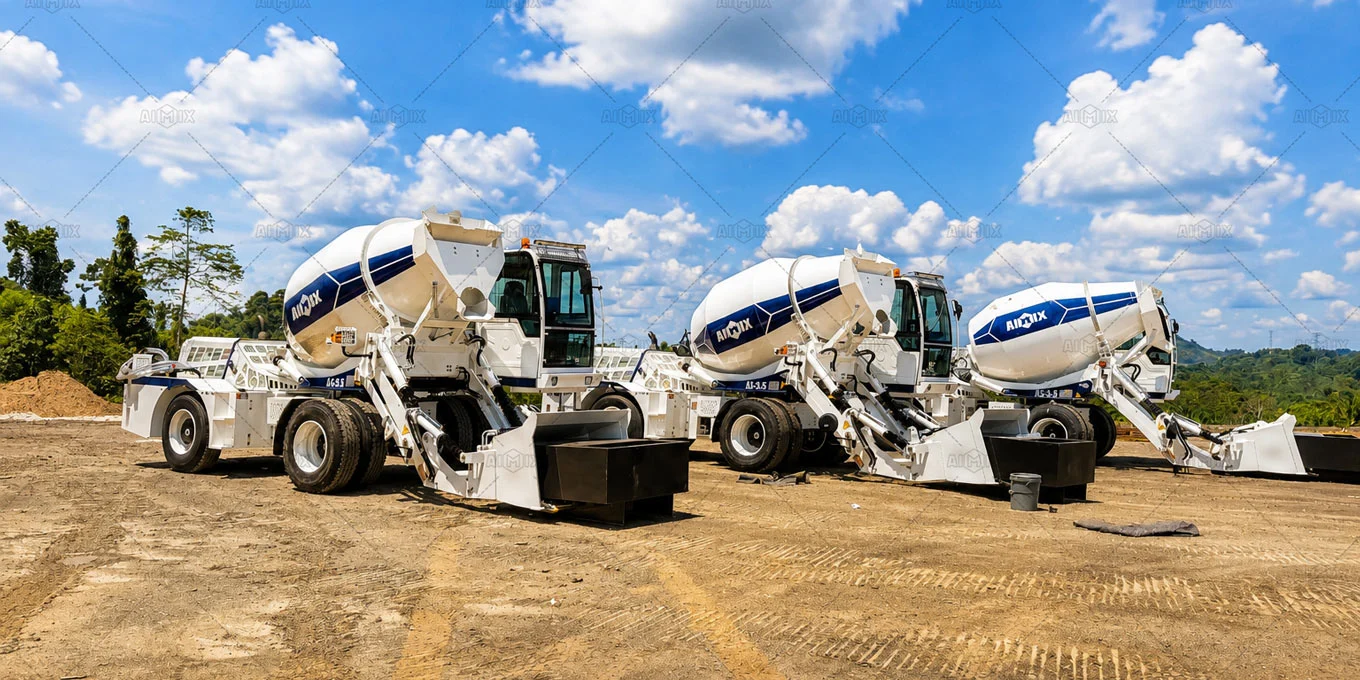
When operating a self-loading concrete mixer, follow five essential safety precautions: read the operator’s manual, inspect the machine before use, keep the work area clear, stay away from moving components, and stop the machine if a critical fault occurs. These precautions help reduce operational risks during material loading, concrete mixing, transportation, and discharge.
Follow the Manufacturer’s Operating Instructions
Read the operator’s manual before using the self loading mixer truck. Understand the operating limits, control functions, warning indicators, and emergency shutdown procedures. Never exceed the machine’s rated capacity or bypass required safety devices.
Maintain a Safe Working Area
Keep unauthorized personnel away from the machine’s operating and travel areas. On confined or uneven construction sites, pay particular attention to pedestrian movement, ground stability, overhead obstructions, and safe travel routes.
Use Safe Operating Practices
Keep hands and other body parts away from the loading bucket, mixing drum, discharge chute, and other moving components. Never reach into the drum or attempt to remove an obstruction while the machine is running. Before cleaning, inspection, or maintenance, shut down the machine and follow the manufacturer’s isolation procedures.
Stop Operation When a Serious Fault Occurs
Stop operating the mixer if you notice a critical warning, abnormal movement, unusual noise, or a suspected braking, steering, or hydraulic fault. Park in a safe location when possible, follow the prescribed shutdown procedure, and arrange an inspection by qualified service personnel before resuming operation.
Following these safety precautions and the manufacturer’s operating and maintenance requirements helps protect operators, reduce equipment-related risks, and support safe concrete production on construction sites.
Regular Maintenance for a Self Loading Concrete Mixer
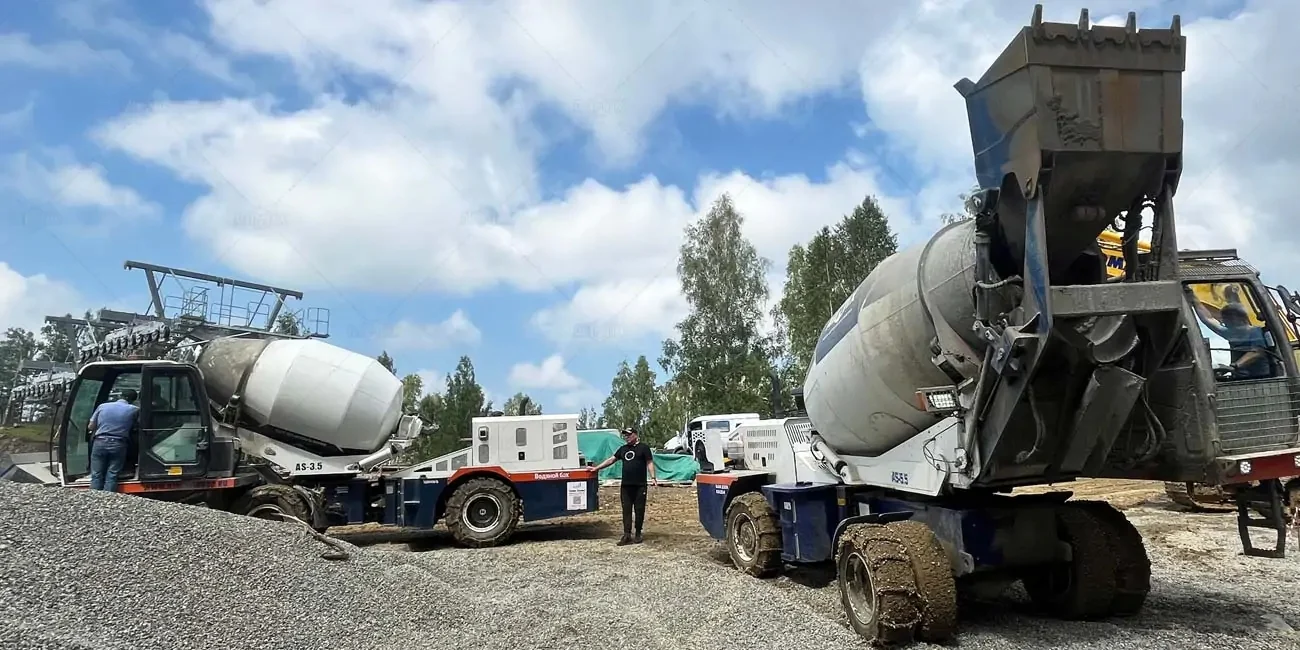
Regular maintenance helps reduce downtime, control component wear, and keep a self loading concrete mixer in serviceable condition. The maintenance for a self loading mobile concrete mixer includes cleaning the mixing drum after each use, servicing the engine and hydraulic system, checking electrical and weighing components, lubricating designated parts, and recording completed maintenance. Follow the manufacturer’s maintenance schedule and operating-hour intervals to reduce avoidable downtime, control component wear, and maintain reliable machine performance.
Clean the Mixing Drum After Each Use
Service the Engine and Hydraulic System
Maintain the Electrical and Weighing Systems
Lubricate Components and Monitor Wear
Keep Maintenance Records
Common Self-Loading Concrete Mixer Problems and Troubleshooting
If a self loading concrete mixer develops a fault, consult the operator’s manual and begin with safe, external checks. The symptoms below can help identify the next step, but they do not establish a definitive diagnosis.
| Common Problem | Initial Checks | Recommended Action |
|---|---|---|
| Engine fails to start | Check the fuel supply, battery condition, dashboard warnings, and required starting conditions. | Follow the prescribed starting procedure. Arrange a qualified inspection if the engine still fails to start. |
| Loading bucket does not operate normally | Check for control warnings, visible obstructions, or signs of hydraulic leakage. | Stop operation if a hydraulic fault is suspected. Have the system inspected by qualified service personnel. |
| Weighing readings appear incorrect | Check for error messages and confirm that the machine is positioned as required for weighing. | Follow the prescribed zeroing or calibration procedure. Do not use unreliable readings for batching. |
| Mixing drum does not rotate normally | Check the selected operating mode and control warnings. | Stop the machine if the drum remains unresponsive or makes unusual noises. Request a technical inspection. |
| Onboard water supply does not work | Check the available water supply and any visible water-line obstruction. | Follow the manual’s troubleshooting procedure. Seek service if the water pump or supply system remains faulty. |
| Concrete residue accumulates in the drum | Check whether the drum and discharge components were cleaned after the previous batch. | Clean the equipment using the approved procedure. Do not attempt to remove hardened residue while the machine is running. |
Important: These are preliminary checks, not a substitute for professional diagnosis. Stop using the machine if braking, steering, hydraulic, electrical, or other critical systems may be unsafe. Do not dismantle pressurized hydraulic components or electrical systems unless you are appropriately qualified and following the prescribed service procedure.
FAQs
How Long Does It Take to Mix Concrete in a Self Concrete Mixer?
How Much Concrete Can a Self Loading Mixer Produce per Hour?
Can a Self Loading Concrete Mixer Produce Different Concrete Grades?
Can One Operator Operate a Self Loading Concrete Mixer?
How Often Should a Self Loader Concrete Mixer Be Maintained?
A self loader mixer requires checks and maintenance at different intervals:
- After each use: Clean the mixing drum, loading bucket, and discharge chute to prevent concrete residue from hardening.
- Before operation: Check relevant fluid levels, tires, brakes, hydraulic hoses, warning indicators, and other safety-critical components.
- At scheduled intervals: Service the engine, filters, hydraulic system, lubrication points, and other components according to the manufacturer’s maintenance schedule and operating hours.
Record completed maintenance tasks and any identified problems. The exact service intervals vary by model and operating conditions, so always consult the operator’s manual.
What Should I Do If a Self Loaded Concrete Mixer Stops Working?
The self loading concrete truck mixer requires checks and maintenance at different intervals:
- If a self loading mixer stops working or develops an abnormal condition, first place the machine in a safe condition and follow the shutdown procedure specified in the operator’s manual. Check the dashboard for warning indicators or fault codes and carry out only the preliminary checks permitted by the manufacturer, such as checking the fuel supply or looking for visible leaks.
- If the problem involves the hydraulic system, electrical components, brakes, steering, or abnormal drum operation, do not continue operating the machine until it has been assessed. Contact qualified service personnel if the cause cannot be identified or resolved safely. Providing the mixer model, warning codes, and a description of the symptoms can help the technical team diagnose the issue.
Can a Self Concrete Mixer Work with a Concrete Pump?
Yes. A self loading mixer truck can work with a compatible concrete pump to support on-site concrete production and placement. The mixer prepares the concrete from raw materials, while the pump delivers the fresh concrete through a pipeline or boom to the required pouring location.
This combination can be useful for building foundations, residential and commercial buildings, road works, and other projects where ready-mixed concrete deliveries are inconvenient or where concrete needs to be transported over a distance or to an elevated location. To achieve reliable pumping, ensure that the concrete mix, aggregate size, workability, and supply rate are compatible with the selected pump and its operating requirements.
Need Help with Self Loading Concrete Mixer Operation or Maintenance?
Correct operation and regular maintenance help your self loading concrete concrete mixer perform reliably on construction sites. If you need guidance on operating procedures, maintenance intervals, spare parts, or troubleshooting, contact the AIMIX technical team for model-specific assistance.
When contacting us, provide the self loading mixer model, a description of the problem, any warning codes displayed, and relevant photos or videos if available. These information can help the technical team understand the issue and recommend the appropriate next steps. Contact AIMIX through the inquiry form, email, or telephone to discuss your equipment requirements and after-sales support.